
[Lesson 15] Drawing a Front 3/4 Figure

Drawing a 3/4 figure is daunting and scary. I kept myself from trying to draw figures of this kind for a long time because of the fear of not doing it right. But, you know what I believe practice makes perfect.
And, after lots of awkward figures, I figured out some basic proportions to use with the same process I’ve been showing you throughout the course.
The steps are quite similar to what you’ve followed so far; you still need the balance line and the center line. The head can have any pose and direction, such as front, side or 3/4. And you also need to have the supporting leg in place.
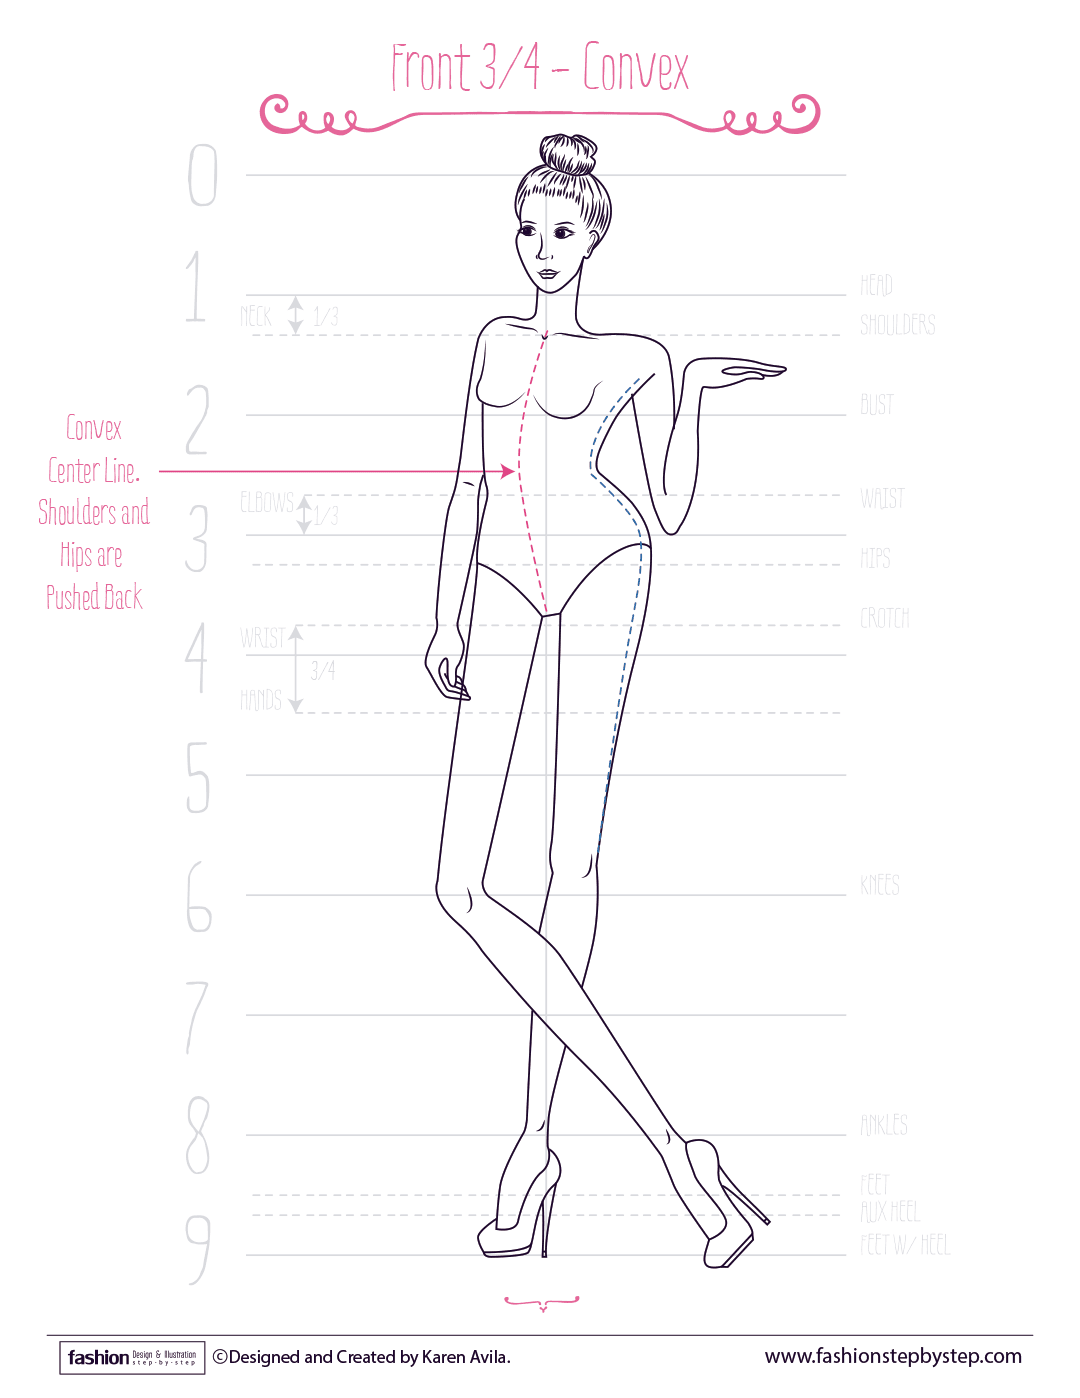
One difference is to make sure that one side of the figure looks foreshortened while the other side looks larger and shows part of the side of the figure.
Also, keep in mind that the center line is super important because it’ll determine the torso’s movement, and how the shoulders, waist, and hips will look – tilted forward or pushed back.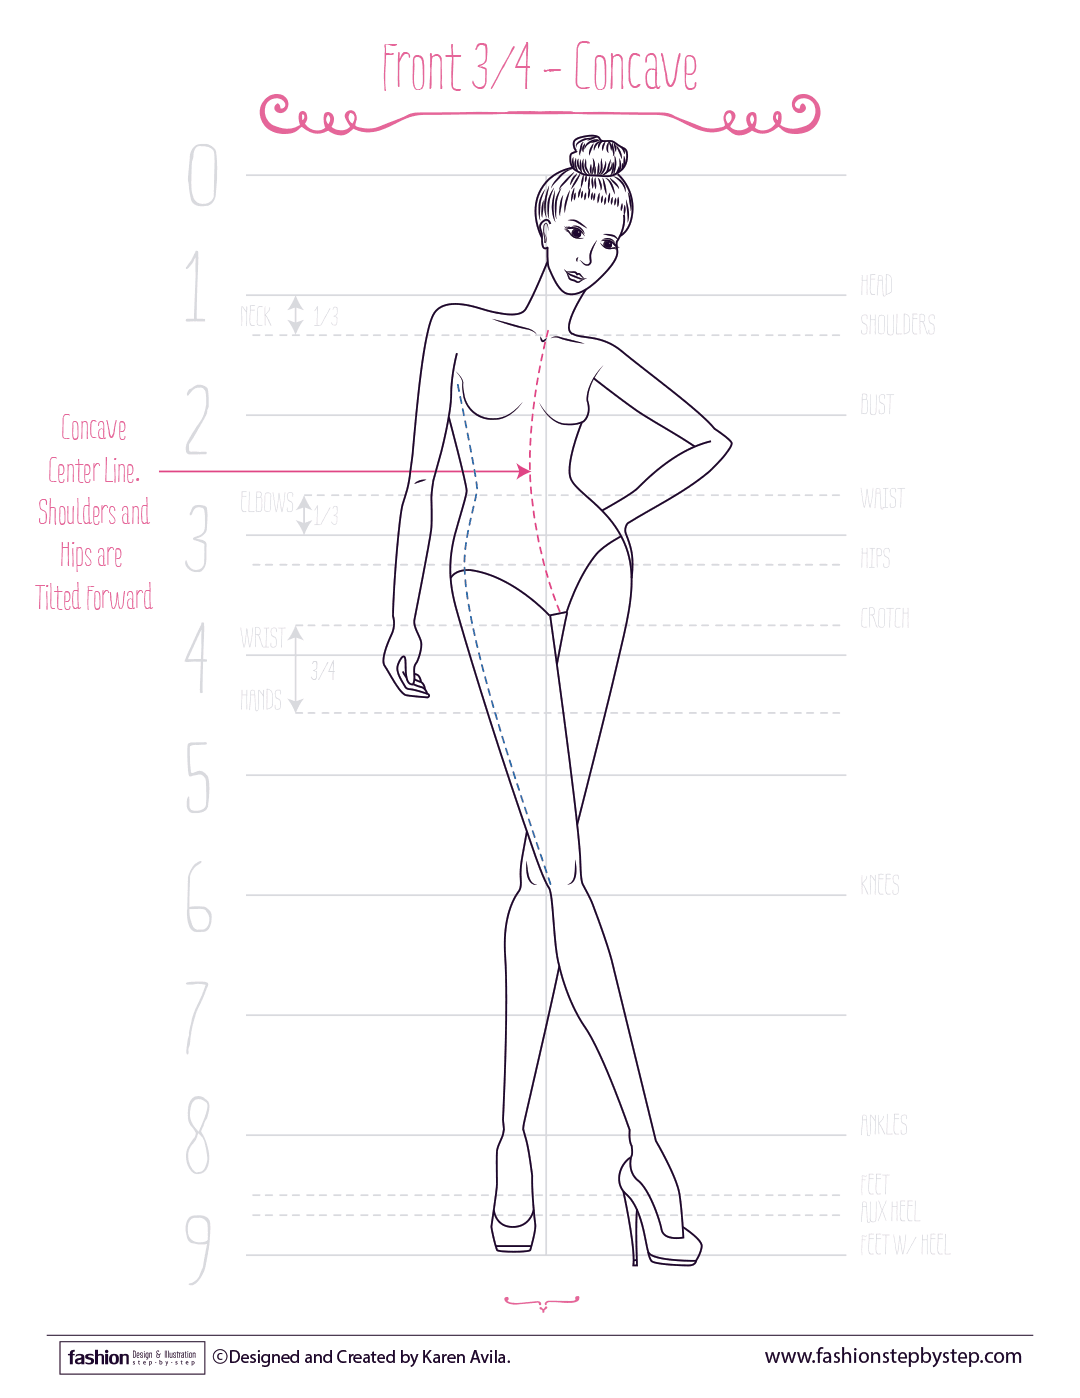
So, what’s different from drawing a front figure?
Instead of dividing the shoulders, waist, hips, and crotch lines into halves by the center line, you will make each line larger on one side of the center line than the other.
In the videos I say: 2/3 of the length of each line on one side, and 1/3 on the other side. But, maybe you want one side to look even more foreshortened, then, vary the proportions accordingly.
Give this kind of posture a try!
DO-THIS
1. Watch the video and read the complement.
2. Get some practice and draw as many figures as you want. Try to vary the position of the legs, arms, and head. And, look at magazines or Pinterest for inspiration.
3. Share your progress on Instagram. Use the hashtags #FashionDrawingBasics and #FashionStepByStep
Share your doubts, ups and downs!