[Lesson 11] Drawing a Figure in Action

In this lesson, you will make your figure more fun by changing the posture, and by adding movement to the torso, hips, and extremities.
How do you Draw a Fashion Figure in Action?
You will follow the same phases from last lesson:
Phase 1. Basic Lines.
Phase 2. Basic Shapes.
Phase 3. Final Figure.
The balance line will remain in the same position (from the base of the neck to the floor), and as its name says, it will help you to balance the figure.
So, what’s different?
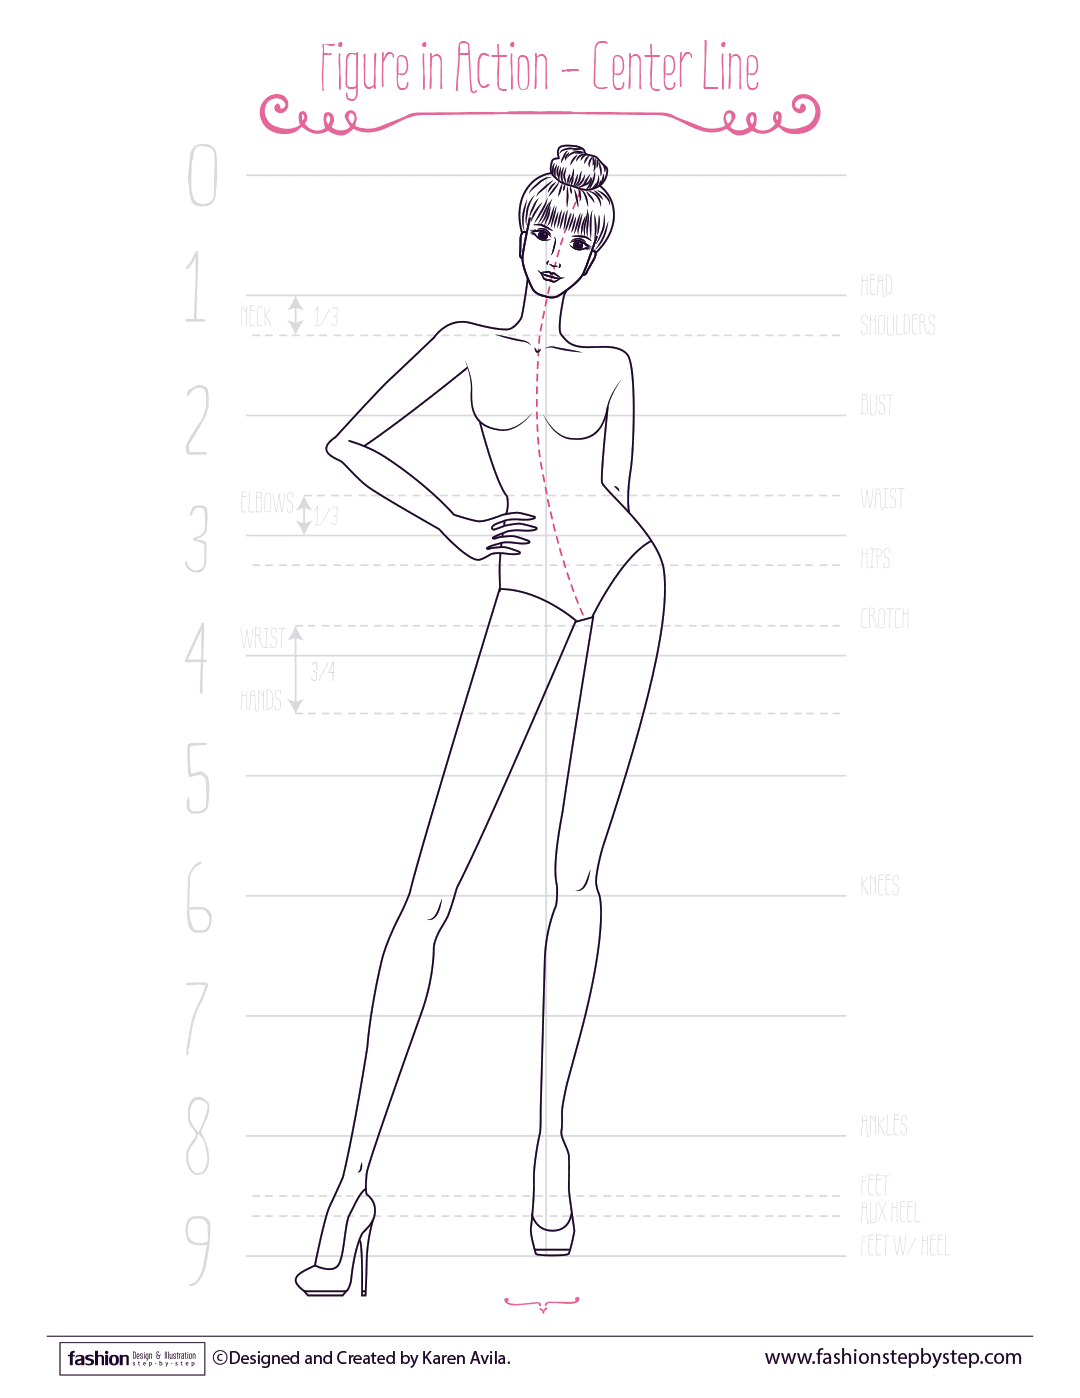
Instead of using the balance line as the center of the body you will create another line, the ‘Center Line’. It could have the shape of an ‘S’ or a ‘C’. It comes from the base of the neck (shoulder’s line) to the crotch. And if you want the head to be inclined, you can extend this new line ’til the top of the head.
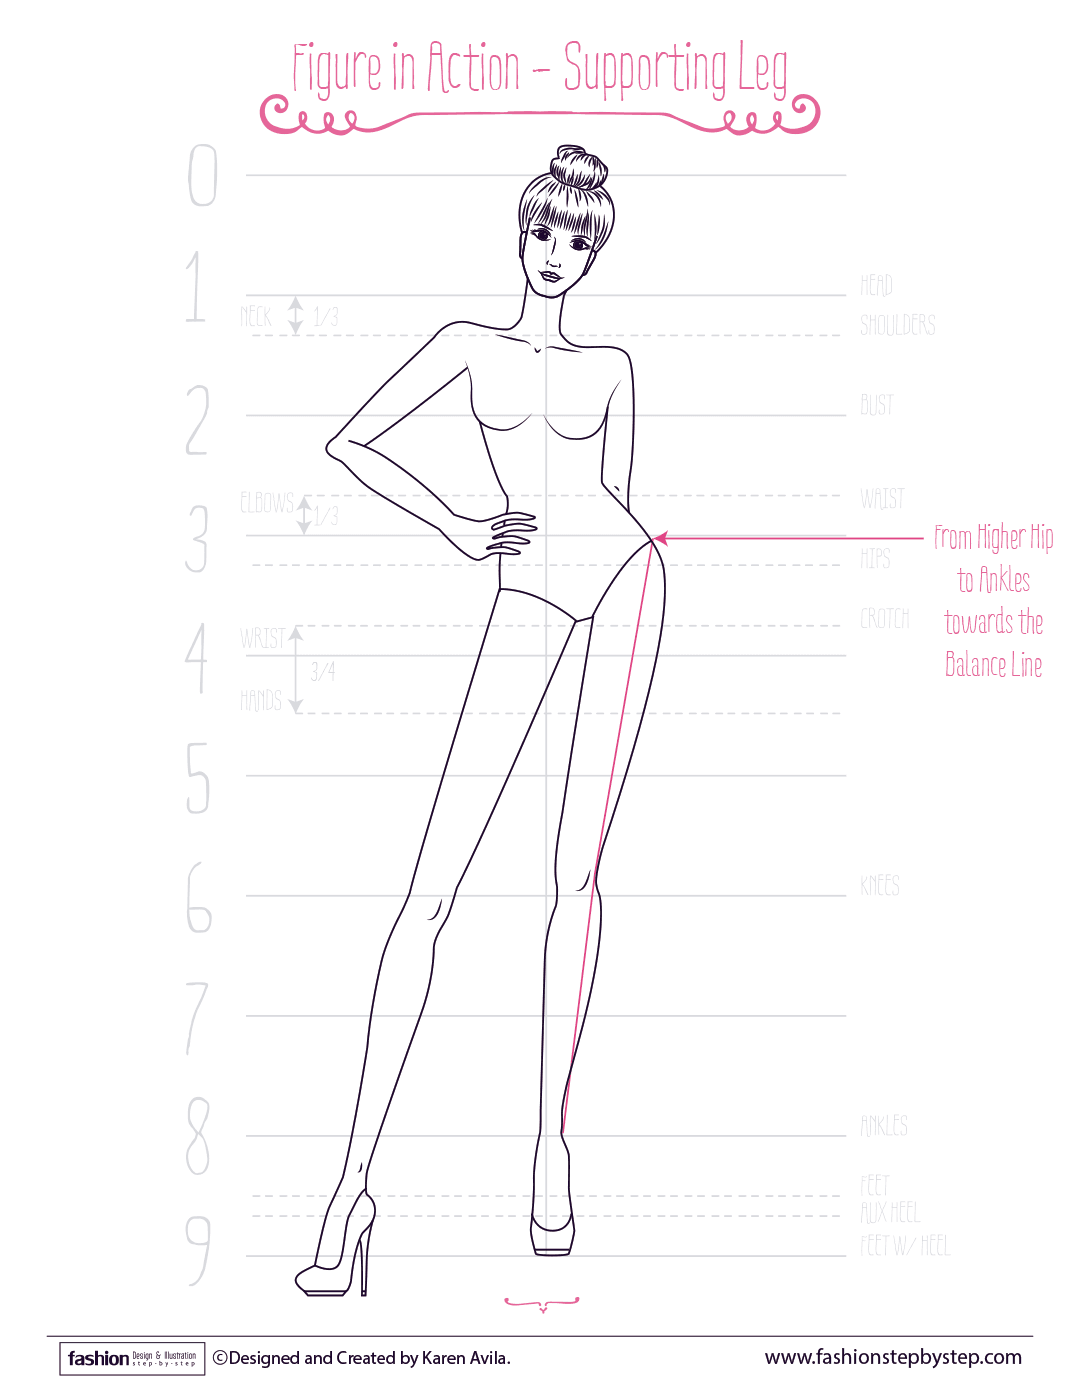
Another difference is in the legs; you can give them varied directions and positions. Make sure you have a Supporting Leg, this comes from the higher hip to the ankles towards the balance line (we will see more details-postures in lesson 14). And it helps you to balance the figure, so it doesn’t look like it will fall.

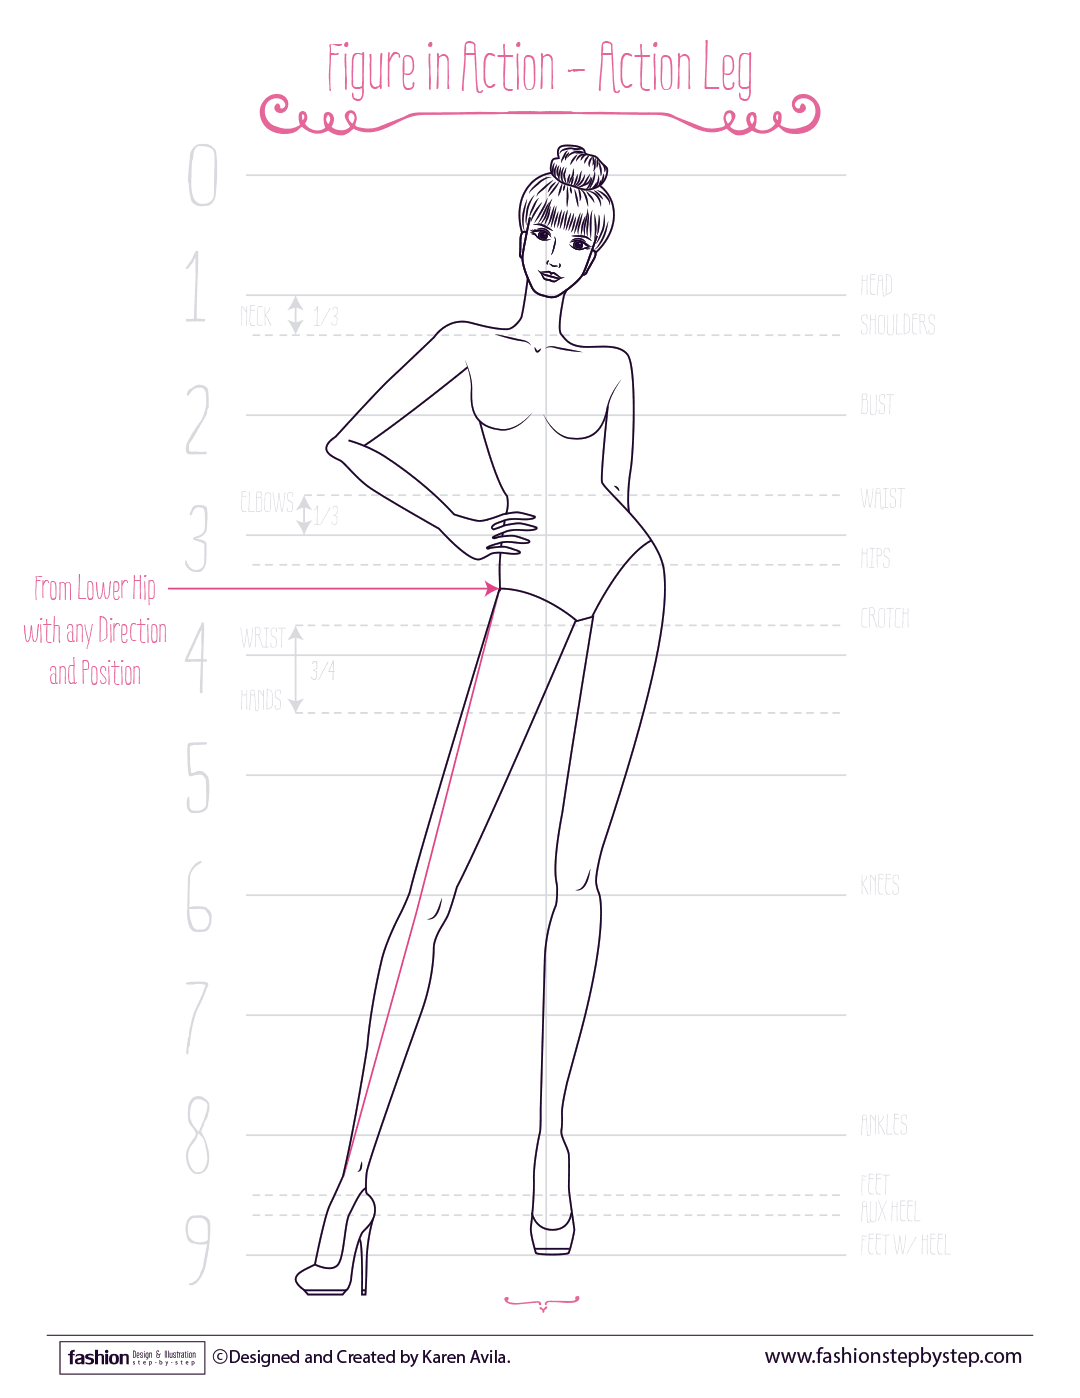
The other leg is the Action Leg. It comes from the lower hip, and it can have any direction and position.

The arms could remain straight, or they could have any direction and position. You just need to keep their proportions.
With these basic changes, you can create a ton of different figures, are you ready?
DO-THIS
1. Watch the video.
2. Read the extra complement.
3. Experiment drawing several action figures featuring different kinds of arms, legs, feet, and hands. And also vary the size and proportions of the torso and hips.
4. Create as many figures as you want!
5. Share your progress on Instagram. Use the hashtags #FashionDrawingBasics and #FashionStepByStep
Share your doubts, ups and downs!
Fashion Figure Cheat-Sheet
Download and print this Cheat-Sheet as many times as you want.

