[Lesson 13] Drawing a Walking Figure

I love this posture because it looks like the figure is on the runway!
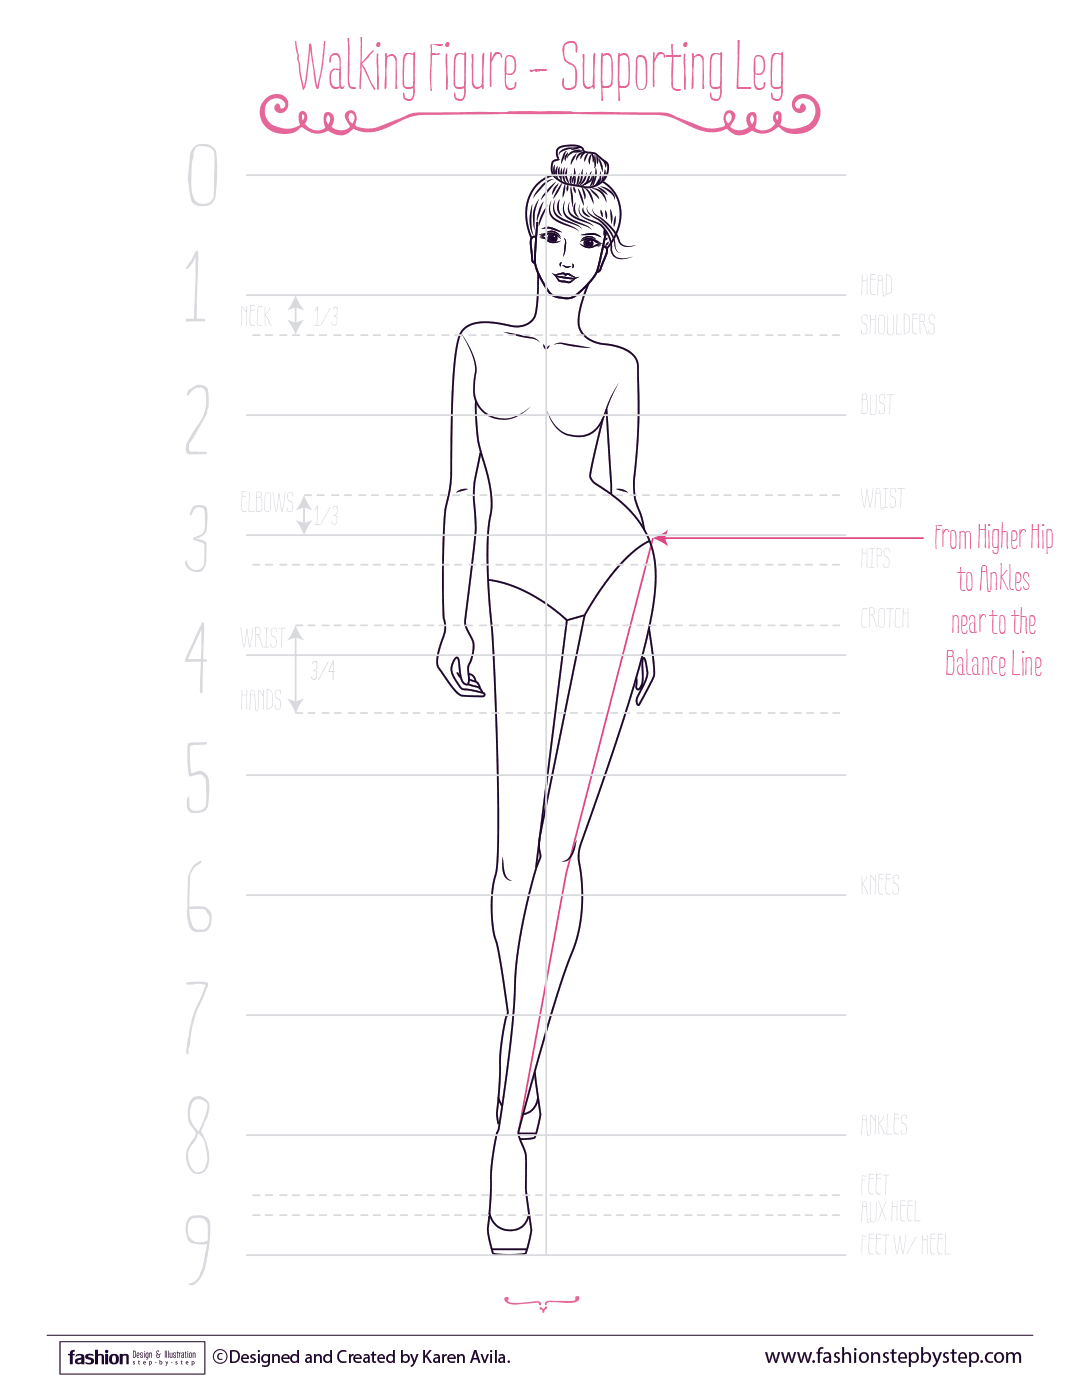
The steps and process are almost the same that you’ve seen so far, and the main difference is in the legs:
– The Supporting Leg comes from the higher hip and goes down to the ankles towards the balance line, as usual.

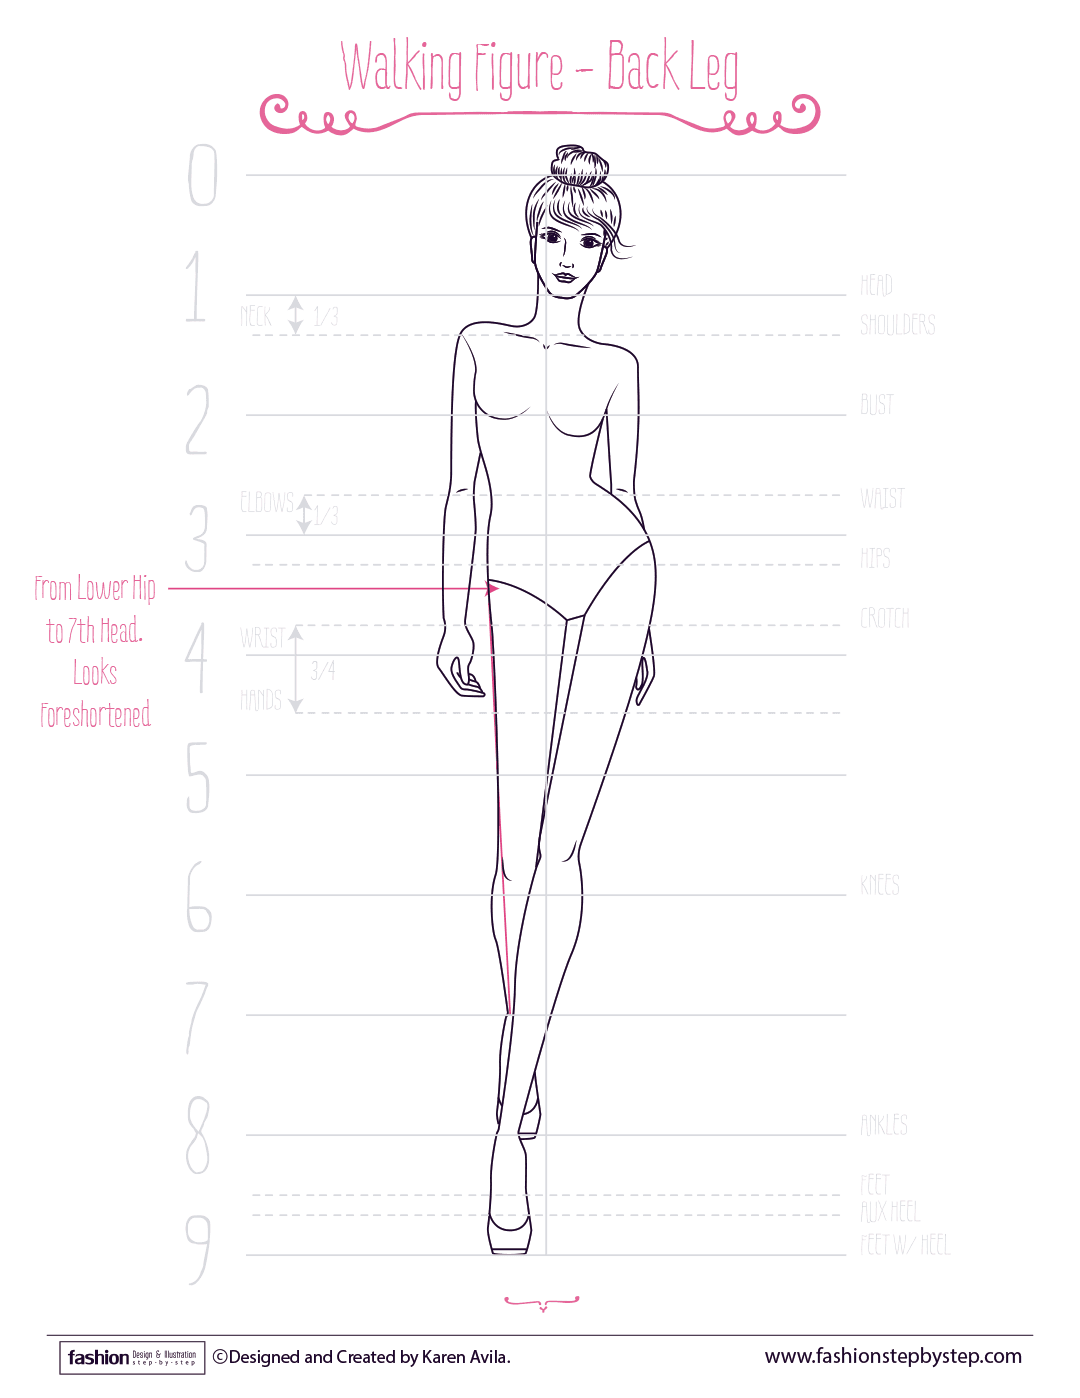
– But, the other leg should be foreshortened and should also look like is behind the supporting leg.
So, how do you Draw the Back Leg?
To draw the back leg, you will follow the same steps but with a twist.
1. Draw a line from the lower hip to the ankles towards the balance line. But, instead of going ’til the ankles line, finish the line for the leg 1 head before. In the Fashion Figure Cheat-Sheet finish the leg on the 7th head.
2. Draw the circles for the knee and ankle. And complete the basic shapes for the leg.
3. Finally, round the basic shapes as you’ve learned. Draw the calf like in the previous lessons but in a shorter space. This will give the leg the foreshortened look we’re looking for.
The arms may fall straight. However, feel free to vary their posture.
That’s it, now go and practice some runway figures! Share your drawings and show us what positions you love for the arms and head.
DO-THIS
1. Watch the video and read the complement.
2. Get some practice and draw as many walking figures as you want, try to vary the position of the arms and head. Look at magazines or Pinterest for inspiration.
3. Share your progress on Instagram. Use the hashtags #FashionDrawingBasics and #FashionStepByStep
Share your doubts, ups and downs!


